Modern Camaro Forums banner

I replaced my factory amp

59K views 20 replies 14 participants last post by  IzzyB  
#1 · (Edited)
First let me say that Steve at Subthump ROCKS!!!! All I did was buy his harness kit and mounting board, a little 8 ga wire and a fuse holder, a couple of hours in the garage and WOW. I have never heard a sound system that good in a car. There is nothing wrong with the BA speakers when they are hooked to a decent amp. I have to turn the gain down a little so I don't go deaf.
I went with the amp that Steve recomends, a JL XD400/4. I found it on Ebay for $300 shipped. I have to tidy up some of the wires yet and snap some pics. I can do a little diy if anyone is interested. Steve already has a lot of info on that orher Camaro site (5).
 
#5 ·
I did some touchup work this weekend and snaped a few more pics. I found out that this amp is too powerful for the stock speakers, if you set the gain too high. I blew one of the rear 6 x 9s and so I am shopping for new speakers. Any suggustions? I am thinking I like a pair of Kicker DS6930 for $75 shipped from SonicElectronics.com.
 
#7 ·
DIY Factory amp replacement

I started this project by reading everything Steve from Subthump had written on C5. It took him many months and what he came up with was a complete wire harness kit and a mounting kit. If you go this route here is what you will need.

Amp: JL HD 400/4 Cost $400 on Ebay.
5G-FARK wiring kit Cost $99 Subthump.
Amp mount kit Cost $12 Subthump.
Wire, 6 ft of red and 4 ft of black 8 gage min. w/ 2 ring terminal ends. (I used 6 gage)
Fuse holder for 40 amp fuse. Cost $13 or less (I went to a car stereo store)
2 RCA shielded patch cables, male on both ends. 1 ft if you can find them that short.


I bought the amp that Steve recommended. There aren’t very many that will fit in the same space as the factory amp without major modifications.

I will skip over some of the details that are covered in Steve’s installation instructions that you get with the wiring kit and focus mainly on the power supply part.

First let’s find the amp. It is on the back wall of the trunk on the driver’s side. Take everything out of the trunk down to the battery. I decided to remove the rear trunk panel because I will have to do it for future mods and I wanted to see how hard it is.

If you don’t have a set of plastic trim removal tools, go buy one. Or take a metal pry bar and wrap it with tape.

Unscrew the 6 cargo tie down lugs.
Starting at the ends, roll off the weather striping. When you get to the little flat spots, (pic 1) get the pry bar under the panel and lift. You will hear the clips pop out. That’s it.


Pic 4 shows the panel removed and you can see where the clips are located.


Next is the molded side carpet section. I didn’t take it out completely. You only have to remove 2 fasteners then you can fold it forward and use something heavy to hold it out of the way. The one on the floor screws off and the one on the top is one of those tree fasteners that you end up cutting off. I didn’t bother replacing it, yet. (pics 2 & 3)


So there it is. One nut and 3 wire plugs and it is out.


Now follow the instructions for the wiring kit and wire the outputs, the trigger wire and the power. You should also plug in the RCA inputs.You want to have all the wires in the amp BEFORE you mount it because it is tight in there and you cannot see the bottom of the amp once it is mounted. Both the X2 and the X3 plugs are marked with front/rear, L/R channels. Channel 1 is LR, 2 is RR, 3 is LF and 4 is RF. I put a small dab of solder on each of the wires so they clamp better.


Tip: Mount the amp as high and to the left (inboard) as you can. All of this wiring and mounting can be done on the bench.

When you try to mount the new amp, you will probably find some interference from a large bead of chalk. (pic 6) Take a razor knife and cut away about ¾ “ or so and scrap it out with a screw driver.


The instruction for the amp say to find a good ground so I thought the easiest way to do that would be to go back to the battery.

On my first try I ran the wires as directly as I could. Then I tried to put the trunk back together. The big foam hat would not sit down. So pic 7 and pic 9 shows a route that will not interfere with the foam hat. Pic 8 shows the foam in place.


The plastic cover that covers the positive battery terminal needs a small notch carved into the side so the power line can be mounted. I just used a side cutter. (pic 10) This picture also shows where I mounted the fuse holder.


This amp came with the input sensitivity (gain) all the way down. Like Steve says you don't need much at all.

Hope this helps. Any questions?
 
#21 ·
DIY Factory amp replacement

I started this project by reading everything Steve from Subthump had written on C5. It took him many months and what he came up with was a complete wire harness kit and a mounting kit. If you go this route here is what you will need.

Amp: JL HD 400/4 Cost $400 on Ebay.
5G-FARK wiring kit Cost $99 Subthump.
Amp mount kit Cost $12 Subthump.
Wire, 6 ft of red and 4 ft of black 8 gage min. w/ 2 ring terminal ends. (I used 6 gage)
Fuse holder for 40 amp fuse. Cost $13 or less (I went to a car stereo store)
2 RCA shielded patch cables, male on both ends. 1 ft if you can find them that short.


I bought the amp that Steve recommended. There aren’t very many that will fit in the same space as the factory amp without major modifications.

I will skip over some of the details that are covered in Steve’s installation instructions that you get with the wiring kit and focus mainly on the power supply part.

First let’s find the amp. It is on the back wall of the trunk on the driver’s side. Take everything out of the trunk down to the battery. I decided to remove the rear trunk panel because I will have to do it for future mods and I wanted to see how hard it is.

If you don’t have a set of plastic trim removal tools, go buy one. Or take a metal pry bar and wrap it with tape.

Unscrew the 6 cargo tie down lugs.
Starting at the ends, roll off the weather striping. When you get to the little flat spots, (pic 1) get the pry bar under the panel and lift. You will hear the clips pop out. That’s it.
View attachment 9720

Pic 4 shows the panel removed and you can see where the clips are located.

View attachment 9723

Next is the molded side carpet section. I didn’t take it out completely. You only have to remove 2 fasteners then you can fold it forward and use something heavy to hold it out of the way. The one on the floor screws off and the one on the top is one of those tree fasteners that you end up cutting off. I didn’t bother replacing it, yet. (pics 2 & 3)

View attachment 9721

View attachment 9722

So there it is. One nut and 3 wire plugs and it is out.

View attachment 9724

Now follow the instructions for the wiring kit and wire the outputs, the trigger wire and the power. You should also plug in the RCA inputs.You want to have all the wires in the amp BEFORE you mount it because it is tight in there and you cannot see the bottom of the amp once it is mounted. Both the X2 and the X3 plugs are marked with front/rear, L/R channels. Channel 1 is LR, 2 is RR, 3 is LF and 4 is RF. I put a small dab of solder on each of the wires so they clamp better.

View attachment 9719

Tip: Mount the amp as high and to the left (inboard) as you can. All of this wiring and mounting can be done on the bench.

When you try to mount the new amp, you will probably find some interference from a large bead of chalk. (pic 6) Take a razor knife and cut away about ¾ “ or so and scrap it out with a screw driver.

View attachment 9725

The instruction for the amp say to find a good ground so I thought the easiest way to do that would be to go back to the battery.

On my first try I ran the wires as directly as I could. Then I tried to put the trunk back together. The big foam hat would not sit down. So pic 7 and pic 9 shows a route that will not interfere with the foam hat. Pic 8 shows the foam in place.

View attachment 9726

View attachment 9728

View attachment 9727

The plastic cover that covers the positive battery terminal needs a small notch carved into the side so the power line can be mounted. I just used a side cutter. (pic 10) This picture also shows where I mounted the fuse holder.

View attachment 9729

This amp came with the input sensitivity (gain) all the way down. Like Steve says you don't need much at all.

Hope this helps. Any questions?
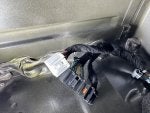
I have a 2015 ZL1 Camaro, with a BOSE system. I removed the stock amp, and purchased the Fark kit from subthump. See attached photos. There is one with my stock ZL1 amp cables. I did not get any cable that plugs into the "white" connector. Did you get something in your kit? The other photo is of my amp. Do you have any photos of your wiring to this amp? Did they send you instructions? I sent an email to subthump about not having a cable to the white connector and also asked for instructions. He has not responded to my email. I guess he got mad when I asked if the kit came with male to male RCA adapters.
 

Attachments

#8 ·
Looks great; how long was the ground? I try to keep mine under 18" long. Otherwise Looks great!
 
#11 ·
It takes 4 ft to get back to the battery. You can use the amp mounting stud if you can get the paint off. Boy that's some good paint.
 
#12 ·
What do you think of Kicker speakers? I'm thinking about them to replace all 4 stock speakers.
 
#13 ·
I would really shorten the ground if you can. Kicker are decent speakers, but JL, polk are better.
 
#15 ·
I didn't think 4 ft of ground would matter but it can go to the mounting stud or I can add a screw into the tail light well.
 
#16 ·
I have always head the shorter ground the better; see what steve says.
 
#20 ·
I installed the JL 400 and no power, after reading JL installation manual it says you may have to add 12v power to "Remote" and that worked. It wasnt clear though from what source do you get the 12v and I assumed jumping the 12v power with a short wire to the 12v Remote? I also notice that when the ignition is turned off the amp power light remains on, whats up with that?